Adding Social Media Icons in your website is very important for user’s social media retention and generating more visibility. Many users feel comfortable hanging out in the Social Media rather than searching for your website.
Video Guide
In order to use Social Icons, you should first enable Top Area Header as Social Icons are only displayed on Top Header for the free version. To do that,
- Navigate to Header Settings >> Top Area
- Then toggle on the Enable Top Area option.
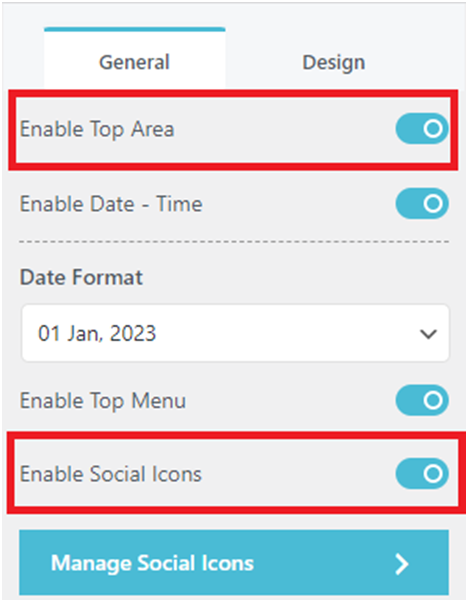
- After that toggle on Enable Social Icon to enable top header for displaying social icons.
- Navigate back to General Settings >> Social Icons to add up to 4 social media icons of your choice.
Note: Only 4 repeater fields are allowed for the free version. You cannot set more than 4 social icons using the free version.
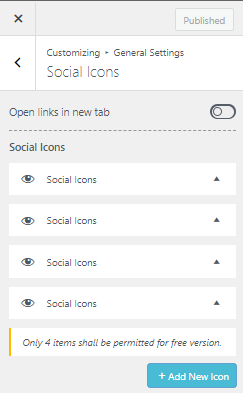
- Drag and drop the Social Icons block to set the order of their display position in the Top Area Header section.
- Click on the eye icon if needed to hide or display the selected Social Icon.
- You can also toggle on or off the “Open in New Tab” option based on whether you want to display your social media page on a new tab or the same tab.
After you have selected the Social icon, add your social media profile link on the link bar.
This will redirect your user directly to your Social Media’s profile after clicking the icon “displayed on the top right hand side of the top area”